Materials:
-screwdriver
-board or cardboard to spray paint on (DO NOT USE A GARBAGE BAG LIKE ME)
-magnetic spray paint (BEFORE YOU DO THIS... PLEASE READ HERE FOR UPDATED INFORMATION REGARDING KRYLON MAGNETIC SPRAY PAINT)
-chalkboard spray paint
-primer spray paint
-spray paint in your favourite colour
-vintage frame (mirrors are awesome, but not all spray paints will adhere)
-sandpaper
-soft cloth
STEP ONE:
Find a mirror.
 |
| Sexxxxyyyyy |
STEP TWO:
Disassemble the entire thing. BE CAREFUL NOT TO DROP ANY IN GRASS.... Oops.. If you have a big heavy mirror like mine, carefully take it out and lay it somewhere safe.
 |
| I swear the ants stole it. |
Sand the mirror and frame lightly with 220 grit sandpaper. This will help everything to really stick.
STEP FOUR:
Layout cardboard or a hard surface (I will soon explain why grass and garbage bag doesn't work) and put your frame and mirror on it.
STEP FIVE:
Spray paint primer on the frame. FOLLOW THE DIRECTIONS! Being lazy and doing it quickly will result in drips, then dry time, then sanding, then repainting. I promise you.
 |
| Plastic bags bunch up and blow in the wind causing missed spots, rubbed off paint and streaks. BAD IDEA. |
STEP SIX:
Spray the mirror with 2 or more coats of magnetic paint. Ensure you read the directions for drying time and how long you have to wait between coats. I believe the Krylon was 30 minutes to four hours, but it was dry to the touch much faster than that.
DISCLAIMER: I have now read that the magnetic paint sucks and won't even hold up a magnetic letter. I will be testing this soon and let you know. If this board is NOT magnetic, it would defeat my entire purpose, putting me into a huge rage.
 |
| Sorry.. it was silver and sunny out, so you can imagine the glare! |
STEP SEVEN:
Spray the mirror with two coats of chalkboard paint. Again, read the directions carefully before applying.
 |
| Remember that sunny day I was talking about? This is actually the same patch of grass as above. |
STEP EIGHT:
Prime the back of the frame by flipping the dry frame over and giving it a good coat. This part really isn't THAT important, because you won't see the back.
STEP NINE:
Once the frame is dry, spray paint with a coat of your favourite colour. THIN coats are best because they do not drip and such. I hung mine from a tree because I was in desperate need of a hard, flat surface and didn't have one.
 |
| The wind blowing it around made it a bit blurry. Sorry! |
STEP TEN:
Once everything is dry (don't be like me and think, Hey! It's not coming off on my hand! It's still not dry after 10 minutes. I swear), assemble.
 |
| Tada! The back (minus one screw). |
Touch ups if you are like me...
 |
| You can barely see it, but I took the paint off the corner. |
STEP TWELVE:
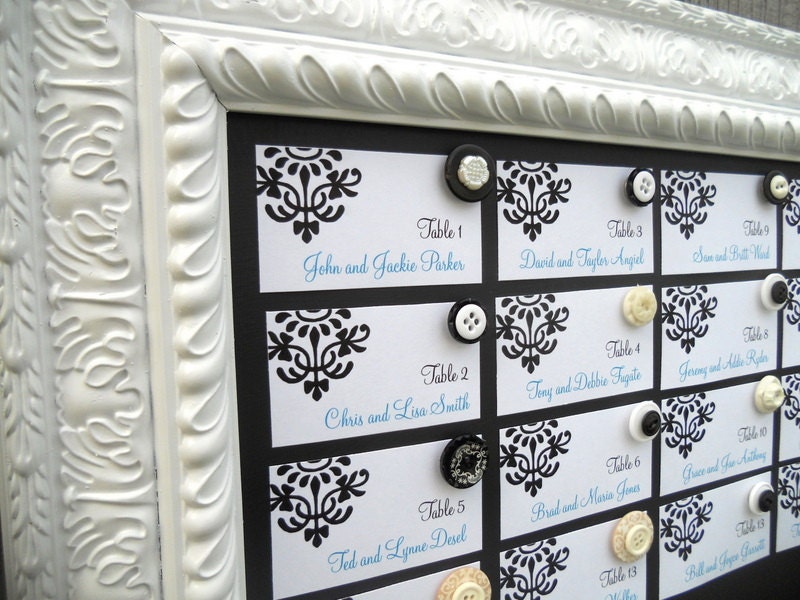
Hang and enjoy. Don't forget to prime the chalkboard before use or it will never be the same!
 |
| Sexy! |
 |
| Beau-ti-ful! |
CAUTION:
-prime before painting will require one versus ten coats
-if it looks like it's barely covering, you are doing it right. Repeat that step over and over again rather than going closer and adding more
-gloves save nails
-doing this in the grass will lead to: Grass marks, streaks, drips, ant stuck to your frame, pollen stuck to your frame, spiders spinning webs and dirt on the back.