I said I would update, and I am doing so in seething anger.
KRYLON MAGNETIC SPRAY PAINT IS A WASTE OF MONEY, TIME AND COMPLETE GARBAGE.
I sprayed four layers of magnetic spray paint on my board before covering it in two THIN layers of chalkboard paint (which they actually have a project for on their site!). This morning, knowing it was completely dry, I put a light advertisement magnet on. It fell off. I tried one of those rare earth magnets I have hanging around. It fell off.
NOTHING STICKS.
So, going back to my project, I would HIGHLY recommend that if you want your board to be magnetic you put a piece of metal in lieu of the mirror/wood you are painting. Ensure the metal is magnetic, as not all metals are. I would then cover that in chalkboard paint. Alternatively, if you live in the US there are other magnetic paints available. The container of paint that you brush on by Krylon, however, has just as horrible reviews.
As for me... I guess the magnets are out and cute writing with a chalk pen is in. *sigh*.
~Miss. Sunshine (isn't) Smil(ing).
Showing posts with label magnet. Show all posts
Showing posts with label magnet. Show all posts
Sunday, May 27, 2012
Saturday, May 26, 2012
DIY: Vintage Style Magnetic Chalkboard
As I mentioned in a previous post, I have started, and due to impatience, completed my magnetic chalkboard to hold my escort cards. Without further ado, a DIY How-To...
Materials:
-screwdriver
-board or cardboard to spray paint on (DO NOT USE A GARBAGE BAG LIKE ME)
-magnetic spray paint (BEFORE YOU DO THIS... PLEASE READ HERE FOR UPDATED INFORMATION REGARDING KRYLON MAGNETIC SPRAY PAINT)
-chalkboard spray paint
-primer spray paint
-spray paint in your favourite colour
-vintage frame (mirrors are awesome, but not all spray paints will adhere)
-sandpaper
-soft cloth
STEP ONE:
Find a mirror.
STEP TWO:
Disassemble the entire thing. BE CAREFUL NOT TO DROP ANY IN GRASS.... Oops.. If you have a big heavy mirror like mine, carefully take it out and lay it somewhere safe.
STEP THREE:
Sand the mirror and frame lightly with 220 grit sandpaper. This will help everything to really stick.
STEP FOUR:
Layout cardboard or a hard surface (I will soon explain why grass and garbage bag doesn't work) and put your frame and mirror on it.
STEP FIVE:
Spray paint primer on the frame. FOLLOW THE DIRECTIONS! Being lazy and doing it quickly will result in drips, then dry time, then sanding, then repainting. I promise you.
STEP SIX:
Spray the mirror with 2 or more coats of magnetic paint. Ensure you read the directions for drying time and how long you have to wait between coats. I believe the Krylon was 30 minutes to four hours, but it was dry to the touch much faster than that.
DISCLAIMER: I have now read that the magnetic paint sucks and won't even hold up a magnetic letter. I will be testing this soon and let you know. If this board is NOT magnetic, it would defeat my entire purpose, putting me into a huge rage.
STEP SEVEN:
Spray the mirror with two coats of chalkboard paint. Again, read the directions carefully before applying.
STEP EIGHT:
Prime the back of the frame by flipping the dry frame over and giving it a good coat. This part really isn't THAT important, because you won't see the back.
STEP NINE:
Once the frame is dry, spray paint with a coat of your favourite colour. THIN coats are best because they do not drip and such. I hung mine from a tree because I was in desperate need of a hard, flat surface and didn't have one.
STEP TEN:
Once everything is dry (don't be like me and think, Hey! It's not coming off on my hand! It's still not dry after 10 minutes. I swear), assemble.
STEP ELEVEN:
Touch ups if you are like me...
STEP TWELVE:
Hang and enjoy. Don't forget to prime the chalkboard before use or it will never be the same!
CAUTION:
-prime before painting will require one versus ten coats
-if it looks like it's barely covering, you are doing it right. Repeat that step over and over again rather than going closer and adding more
-gloves save nails
-doing this in the grass will lead to: Grass marks, streaks, drips, ant stuck to your frame, pollen stuck to your frame, spiders spinning webs and dirt on the back.
Materials:
-screwdriver
-board or cardboard to spray paint on (DO NOT USE A GARBAGE BAG LIKE ME)
-magnetic spray paint (BEFORE YOU DO THIS... PLEASE READ HERE FOR UPDATED INFORMATION REGARDING KRYLON MAGNETIC SPRAY PAINT)
-chalkboard spray paint
-primer spray paint
-spray paint in your favourite colour
-vintage frame (mirrors are awesome, but not all spray paints will adhere)
-sandpaper
-soft cloth
STEP ONE:
Find a mirror.
 |
| Sexxxxyyyyy |
STEP TWO:
Disassemble the entire thing. BE CAREFUL NOT TO DROP ANY IN GRASS.... Oops.. If you have a big heavy mirror like mine, carefully take it out and lay it somewhere safe.
 |
| I swear the ants stole it. |
Sand the mirror and frame lightly with 220 grit sandpaper. This will help everything to really stick.
STEP FOUR:
Layout cardboard or a hard surface (I will soon explain why grass and garbage bag doesn't work) and put your frame and mirror on it.
STEP FIVE:
Spray paint primer on the frame. FOLLOW THE DIRECTIONS! Being lazy and doing it quickly will result in drips, then dry time, then sanding, then repainting. I promise you.
 |
| Plastic bags bunch up and blow in the wind causing missed spots, rubbed off paint and streaks. BAD IDEA. |
STEP SIX:
Spray the mirror with 2 or more coats of magnetic paint. Ensure you read the directions for drying time and how long you have to wait between coats. I believe the Krylon was 30 minutes to four hours, but it was dry to the touch much faster than that.
DISCLAIMER: I have now read that the magnetic paint sucks and won't even hold up a magnetic letter. I will be testing this soon and let you know. If this board is NOT magnetic, it would defeat my entire purpose, putting me into a huge rage.
 |
| Sorry.. it was silver and sunny out, so you can imagine the glare! |
STEP SEVEN:
Spray the mirror with two coats of chalkboard paint. Again, read the directions carefully before applying.
 |
| Remember that sunny day I was talking about? This is actually the same patch of grass as above. |
STEP EIGHT:
Prime the back of the frame by flipping the dry frame over and giving it a good coat. This part really isn't THAT important, because you won't see the back.
STEP NINE:
Once the frame is dry, spray paint with a coat of your favourite colour. THIN coats are best because they do not drip and such. I hung mine from a tree because I was in desperate need of a hard, flat surface and didn't have one.
 |
| The wind blowing it around made it a bit blurry. Sorry! |
STEP TEN:
Once everything is dry (don't be like me and think, Hey! It's not coming off on my hand! It's still not dry after 10 minutes. I swear), assemble.
 |
| Tada! The back (minus one screw). |
Touch ups if you are like me...
 |
| You can barely see it, but I took the paint off the corner. |
STEP TWELVE:
Hang and enjoy. Don't forget to prime the chalkboard before use or it will never be the same!
 |
| Sexy! |
 |
| Beau-ti-ful! |
CAUTION:
-prime before painting will require one versus ten coats
-if it looks like it's barely covering, you are doing it right. Repeat that step over and over again rather than going closer and adding more
-gloves save nails
-doing this in the grass will lead to: Grass marks, streaks, drips, ant stuck to your frame, pollen stuck to your frame, spiders spinning webs and dirt on the back.
Back to Lovin' It!!
Man, am I ever back in the DIY swing of things! And all because of this:
Now to the backstory on this whole thing. Months ago, when I was first engaged and looking on Pinterest for every find on the internet, I stumbled across this gem someone had pinned from Etsy.
I fell in love. And not that "oh it's nice love", but that "OMGZ! I MUST SHOW THIS TO EVERYONE I KNOW SO THEY CAN BASK IN ITS GLORY!!!" love. In fact, I did show it to everyone I knew. And do you know what they all said? All of them said something to the effect of "Great seller, cool store, but that's almost $400 Canadian for the frame and shipping."
Hello reality check, goodbye my first love.
But I'm a DIY'er, so you know I was gonna kill it hard, which led to at least 10-15 different (and failed) trips to thrift stores, and 6 weekends of garage sale shopping. So today, when I saw this gem, Mr. Sunshine cringed a little and I went YES! He couldn't see past the horrible gold and ornate shape, while all I could see was white and black. Cream and black? White and grey? The rest was to be determined.
So, with my reveal coming up in the days to follow (spray painting takes time!), here is a quick breakdown of the cost of this beauty...
Mirror: $15 (I talked them down from $20. It was after 9am, after all!)
Krylon chalkboard spray paint: $7.50 (Michaels with coupon.... but later saw it for $5.99 at Canadian Tire!)
Kryon magnetic spray paint: $7.50 (Michael's with coupon) PLEASE READ MY HORRIBLE REVIEW AND FIND A BETTER OPTION FOR YOU!
Spray Paint Primer: $8
Cream Spray Paint: $5.50
TOTAL COST: $43.50
With that sounding high, keep in mind I have at least a half bottle of magnet paint and will have at least a half bottle of chalkboard paint left, as well as an AWESOME chalkboard/magnet frame we can hang on our wall!
Anyone else copy a design to becheap ... er... frugal?
~Miss. Sunshine
 |
| My preeecccccioooussssss! |
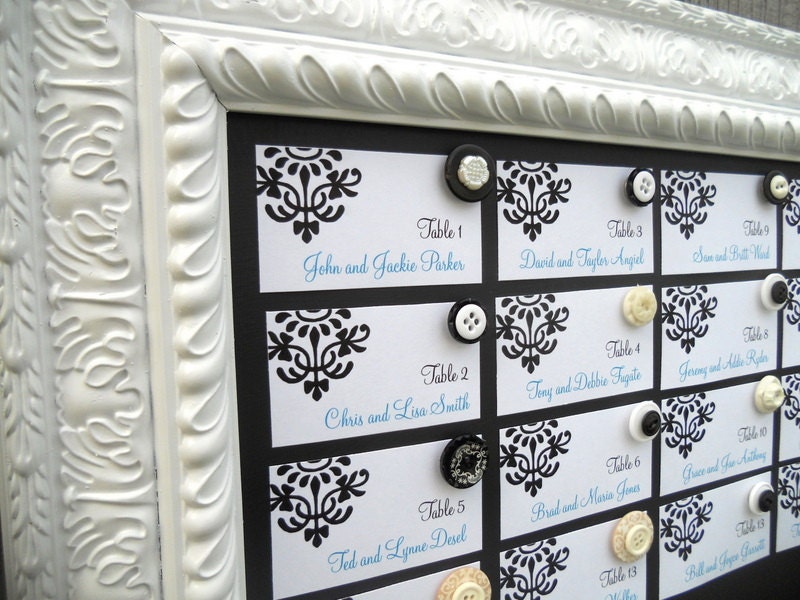 |
| Magnetic escort board, complete with button magnets. I know. I fell in love too. From here. |
Hello reality check, goodbye my first love.
But I'm a DIY'er, so you know I was gonna kill it hard, which led to at least 10-15 different (and failed) trips to thrift stores, and 6 weekends of garage sale shopping. So today, when I saw this gem, Mr. Sunshine cringed a little and I went YES! He couldn't see past the horrible gold and ornate shape, while all I could see was white and black. Cream and black? White and grey? The rest was to be determined.
So, with my reveal coming up in the days to follow (spray painting takes time!), here is a quick breakdown of the cost of this beauty...
Mirror: $15 (I talked them down from $20. It was after 9am, after all!)
Krylon chalkboard spray paint: $7.50 (Michaels with coupon.... but later saw it for $5.99 at Canadian Tire!)
Kryon magnetic spray paint: $7.50 (Michael's with coupon) PLEASE READ MY HORRIBLE REVIEW AND FIND A BETTER OPTION FOR YOU!
Spray Paint Primer: $8
Cream Spray Paint: $5.50
TOTAL COST: $43.50
With that sounding high, keep in mind I have at least a half bottle of magnet paint and will have at least a half bottle of chalkboard paint left, as well as an AWESOME chalkboard/magnet frame we can hang on our wall!
Anyone else copy a design to be
~Miss. Sunshine
Subscribe to:
Posts (Atom)